
To reduce calories yet still enjoy fresh bread, I often make flat bread because it’s quick, simple to make, and tastes delicious.
This type of crisp and thin bread is also great to serve with different types of dips or with cheese and wine. Personally, I prefer it over crackers. The kids also love munching on this bread even when served plain.
Enjoy fresh baked bread everyday at home
Flat bread is also extremely easy to make, with very few basic ingredients, such as flour, yeast, and water.
The other advantage of this wonderfully simple recipe is that you can refrigerate the dough for up to three days and then bake fresh bread each day. Simply divide the dough into three portions, use one immediately, and then save the other two for the following days.
Less is more when it comes to flat bread
To feel like you’re eating plenty, but not consuming as many calories, roll out my dough into super thin pieces. To the point where it’s almost translucent. This helps make the bread extra crispy and very airy.
Baking flat bread requires plenty of heat
Baking flat bread requires very high temperature. I would not dip below 450 degrees Fahrenheit or 230 degrees Celsius. It’s also helpful if you have a pizza stone for your oven so you can directly bake your bread on the stone.
Best flour to use for baking your bread
For this recipe I chose wheat flour from Poland, type 550. You can also bake a healthier version using whole wheat flour, type 2,000. Or, to mix half of the 550 type and half of the 2,000 type to balance the taste. You can also use all-purpose flour if that’s easier, or the Italian 00 type, but I find that the Polish flour adds a nice wheat-like taste that I prefer.

Flat Bread
Ingredients
- 5 cups all-purpose flour (Type 550 - at least 11% protein)
- 2 cups warm water
- 1 tsp sugar
- 2 tsp sea salt
- 1 tsp dry active yeast (10 grams of fresh yeast)
- 1 tbs olive oil
Instructions
-
In a stand-mixer bowl, pour 2 cups of warm water.
-
Add sugar and two tablespoons of flour.
-
Mix it with a whisk and add the yeast.

-
Wait 5-10 minutes for the yeast to activate.
-
Add salt and the rest of the flour and mix the ingredients with a spoon until combined.
-
Using a hook tool of your stand mixer, mix the dough on a medium speed for 5-7 minutes.
-
If your dough does not start to peal off the walls of the bowl, add 2-3 tbs of flour. Make sure to not add too much flour as it will make the dough less supple.
-
Once the dough starts to peal off the walls of the bowl, pour in the olive oil.
-
Mix the dough for 5 more minutes.
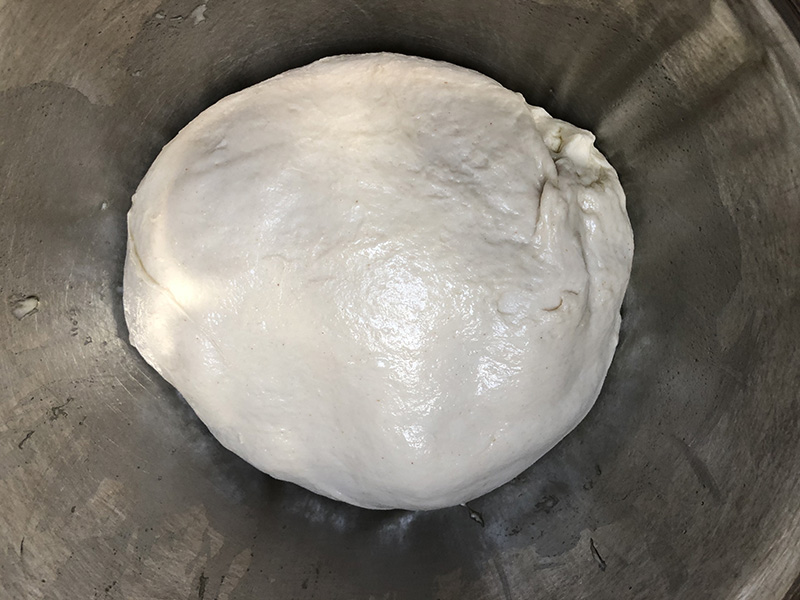
-
Let it rest for at least 45 minutes covered with a clean dish towel.

-
Preheat the oven to 500 degrees Fahrenheit or 260 degrees Celsius.
-
Cut two sheets of parchment paper (25x25 cm or 10 inches x 10 inches)
-
Once the dough doubles in size, take about 30 grams (1 oz) of dough, sprinkle some flour onto a clean flat surface, and using a roller pin roll out the dough into long and thin pieces. Place them onto the cut squares of parchment paper, about three on each.

-
Bake your bread by placing the parchment paper with the rolled out pieces onto a pizza stone. Bake for about 5 minutes, until the breads start getting a lightly golden tint.
-
Repeat for the next set of breads. If needed, save left over dough in the fridge for up to 3 days so you can make some more fresh flat bread over the next few days.
-
Cool off the baked breads for about 5 minutes and enjoy with some cheese, or dipped in olive oil and grated parmesan.


{ 45 comments… read them below or add one }
Finally, a clear answer on whether Medicare pays for flu shots!
It’s good to know which parts of the program cover preventative care.
Providers insurance
The Gates of Olympus slot game has impressive sound effects.
https://propertylist.ae/author/mayamolloy9423/
Азино 888 казино сайт регулярно обновляет
рабочие ссылки. Азино888 официальный всегда доступен через зеркало.
Это повышает удобство пользования.
azino888 казино зеркало
Сайт selector casino удобен даже для тех, кто впервые зашёл в онлайн-казино.
Всё понятно и логично. Не приходится долго разбираться.
казино селектор
Слайд-шоу из больших баннеров с изображениями в главном разделе, на которых изображены счастливые лица с широкими улыбками, производит
отличное первое впечатление.
Базовый платный тариф предлагает обычные маркетинговые инструменты, а более
продвинутые тарифы включают в себя функции, более подходящие для онлайн-магазинов.
Все планы предлагают щедрые ресурсы, инструменты маркетинга и SEO, неограниченную пропускную
способность, бесплатный сертификат SSL и круглосуточную поддержку.
Публикуйте советы и объяснения для тех, кто хочет узнать больше о медитации.
Очередной сайт, которому достаточно на главном экране цепляющего текста.
Если вам нравится природа и ее
звуки, то сайт EarthFm — это то, что
вам нужно.
Здесь можно увидеть более миллиона старых карт, которые относятся к разным
периодам истории.
Получайте наши электронные письма о вдохновении и советах по развитию вашего творческого бизнеса.
На сайте представлена внушительная библиотека
текстов, видео- и аудиоматериалов для изучения английского языка с нуля бесплатно.
Все в дизайне сайта Singita излучает роскошь премиум-класса, что тесно связано с высококачественными визуальными
эффектами бренда и изысканно обставленными объектами недвижимости.
По сути, это очень гибкий редактор
страниц для WordPress, в котором есть множество мощных инструментов на базе
ИИ.
В среднем самые популярные тарифные планы стоят одну–две тысячи рублей в месяц, если
покупать подписку сразу на год.
Чтобы начать работу над онлайн-магазином, надо будет выйти из
редактора сайта и открыть другой раздел — Store Manager,
но переключаться между ними очень просто.
Социальные значки, такие как
Pinterest, Instagram, LinkedIn и Facebook, призывают вас действовать и исследовать больше.
Тут есть множество доступных цветов, шрифтов, блоков и шаблонов, вы
также сможете сохранять цветовые палитры и шрифтовые схемы для
использования на всем сайте сразу.
Этот сайт идеально подойдет как для увлекательного времяпровождения,
так и для научных исследований.
Numbeo — это интересный сайт, который
можно посетить, когда вам скучно, вы ищете развлечений или хотите открыть для себя
что-то новое.
Если вам скучно или вы ищете интересные сайты
для развлечения, Purrli.com стоит посетить.
В целом, это очень увлекательный и захватывающий сайт, который дает
вам возможность заглянуть за кулисы аэропорта и узнать больше о том,
как все работает.
Кроме того, сайт также предоставляет возможность следить
за активностью на территории супермаркета,
где можно наблюдать за покупателями и сотрудниками магазина.
Мы надеемся, что эта статья дала несколько свежих идей для хорошего веб-дизайна.
Сайт National Geographic использует минималистичный дизайн и
качественные изображения,
чтобы создать атмосферу загадочности и вдохновения.
Светлый шрифт san-serif помогает донести до пользователя четкие сообщения
и инструкции.
Насколько легко изменить шаблон в соответствии с вашими потребностями, значительно варьируется
от одного сайта к другому.
Ретрофутуризм, например, органично сочетает ностальгические визуальные элементы с современной функциональностью,
что можно наблюдать в ежегодной кампании Spotify Wrapped.
Помните, современный креативный дизайн в первую очередь простой и интуитивно понятный.
Нужно всего лишь заказать
товары из Китая, вкусности из Японии или косметику из Кореи и продавать дома.
Эта безупречная эстетика также помогает установить доверительные отношения с пользователем, что в конечном итоге способствует повышению конверсии.
Игра выполнена в красочной 2D графике и имеет
простой, интуитивно понятный интерфейс, который позволяет легко управлять шариками с помощью мыши или сенсорного экрана.
Иногда приходится переключаться между несколькими меню,
чтобы изменить формат страницы, и не всегда понятно, как изменить дизайн страницы.
Если не получилось с первого раза уловить смысл, прочитайте текст, а потом еще раз прослушайте запись.
Вряд-ли кто-то всерьез воспринимает
подобные советы, но многие будут заходить с развлекательной целью.
Это отличный источник развлечений для тех, кто
ищет забавные сайты, чтобы убить время, или нуждается в
приложениях от скуки.
Программа использует алгоритмы машинного
обучения для преобразования фотографии в анимированный персонаж.
Они работают на базе Dribbble, используя исключительно их снимки, поэтому для комментирования и
взаимосвязи, вам нужно будет перейти
на этот веб-сайт.
Кондиционеры Hisense: особенности и преимущества комфорта
Обзор кондиционеров Hisense преимущества их использования для вашего комфорта
Системы контроля
Модели этой марки обладают режимами, позволяющими поддерживать оптимальную атмосферу.
Автоматические датчики температуры и влажности гарантируют комфортные условия
на протяжении всего года.
Технологии фильтрации
Фильтры, применяемые в устройствах, эффективно очищают воздух от пыли и аллергенов.
Они значительно увеличивают
качество внутренней среды, создавая здоровую обстановку в помещениях.
Энергоэффективность
Эти устройства отличаются
высокими коэффициентами энергоэффективности.
Благодаря современным компрессорам и интеллектуальным системам управления энергией, пользователи могут значительно
сократить расходы на электроэнергию.
Уровень шума
Среди ключевых достоинств – бесшумная работа.
В моделях предусмотрены технологии, минимизирующие шум, что особенно важно для жилых помещений и офисов.
Дизайн и удобство управления
Современный и стильный внешний вид легко вписывается в любой интерьер.
Удобные пульты дистанционного управления
и мобильные приложения позволяют легко
настраивать режимы работы.
Специальные функции
Особое внимание стоит уделить функциям, таким как таймер и режимы самоочистки.
Эти преимущества упрощают эксплуатацию и
увеличивают срок службы оборудования.
Гарантия качества
Производитель предоставляет достойные условия гарантии, что подтверждает надежность и долговечность своей
продукции.
При выборе техники данной марки
вы получаете целый ряд преимуществ,
способствующих созданию оптимального микроклимата в вашем доме или офисе.
Типы устройств Hisense
Сплит-системы имеют высокую производительность и отлично подходят для жилых и офисных помещений.
Модели с двумя блоками обеспечивают способы установки, позволяя выбрать оптимальное расположение внутри и снаружи.
Это важно для поддержания визуального комфорта.
Мобильные решения позволяют быстро
перемещать аппарат в зависимости от потребностей.
Удобные колеса и компактные размеры
дают возможность использовать такие аппараты практически
в любом помещении, обеспечивая
комфорт там, где это необходимо.
Кассетные системы интегрируются в потолок и идеально подходят для коммерческих помещений.
Они обеспечивают равномерное распределение воздуха
и не нарушают интерьер.
Внешний вид и производительность таких моделей делают
их идеальным выбором для офисов и магазинов.
купить кондиционер в москве
Риск через наркотиков — этто сложная проблема, обхватывающая физическое, психическое также соц
состояние здоровья человека. Употребление подобных наркотиков,
как снежок, мефедрон, гашиш, «наркотик» или «бошки», может родить ко необратимым результатам как для организма, яко (а) также для среды на целом.
Но даже у вырабатывании связи возможно восстановление — главное, чтоб зависимый явантроп обернулся за помощью.
Важно запоминать, яко наркозависимость врачуется, и реабилитация
бацнет шанс на новую жизнь.
We Help You Charter out Apartments In Dubai Apace And Safely.
Upon The Paramount Deals, Prime Locations, And Full Submit to From Our Experts.
We Supporter You Charter out Apartments In Dubai Quickly And Safely.
Find The Most appropriate Deals, Prime Locations, And Complete Stand From Our Experts.
We Supporter You Rent Apartments In Dubai Apace And Safely.
See The Most appropriate Deals, Prime Locations, And Enormously Support From Our Experts.
We Help You Hole Apartments In Dubai Quickly And Safely.
Upon The Paramount Deals, Prime Locations, And Highest Support From Our
Experts.